Weekend Cooking; Flavor of the Week

(My breakfast)

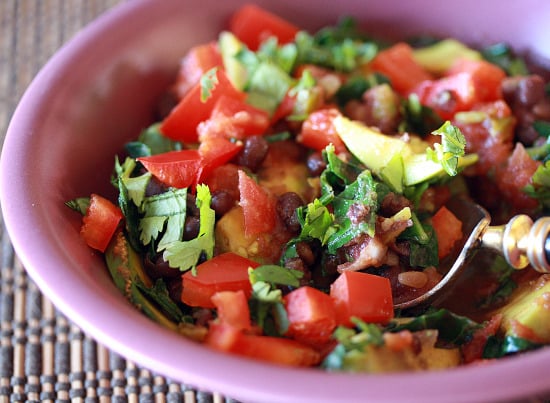
What a title.  I’ve been reading Flavor of the week by Tucker Shaw for a day or two and while the story is less than fetching each chapter ends with an interesting recipe.  Last night this is the recipe I ended with and as I drifted to sleep my thoughts were on breakfast already.  Tucker Shaw is the food editor for the Denver Post so it makes some sense that his recipes would be memorable.

Hot-Buttered Maple-Baked Oatmeal (my notes)


2 cups old-fashioned oats (not instant or quick)
pinch (sea) salt
1/3 cup maple syrup
3 cups whole milk (i used 1%)
1 (farm fresh) egg
1 T. vanilla (real)
1/4 cup brown sugar
1 tsp cinnamon (hefty sprinkle on top before baking)
raisins, coconut flakes or almonds for topping (all optional)


1. Preheat oven to 350*.  Position rack in the middle of the oven.
2. In a large bowl combine oats and salt.
3. In a smaller bowl mix together the maple syrup, milk, egg, and vanilla.  Pour over oats; mix well.
4. Pour the oat mixture into a glass baking dish (I used a 9 x 13). Bake for about 40 minutes, stirring once midway through.  Remove from oven.  (We stirred it at 20 minutes and only let it cook another 10-it was perfect)
5. Sprinkle the oats with brown sugar and return to the oven for 5 minutes.  The brown sugar will get all melty, which is exactly what you want.
6. Serve in warm bowls with a big hunk of butter and a drizzle of maple syrup that you’ve zapped in the microwave for about 30 seconds.  Top with yummy toppings.  We had little bowls of brown sugar, raisins, cranberries, and walnuts at the table to sprinkle as well as a little milk pour on top.

My husband did the stirring at 20 minutes and he thought it looked done at that point.  As our 9-year-old bounced on our bed earlier he told her about this delicious idea for breakfast and she seemed at best dubious!  She was like “I like my regular oatmeal.  This sounds too baked, too dry, too crunchy!”  He didn’t want it to turn out like her worst ideas and truly it was creamy and wonderful with less cooking time.  You decide.
It serves four and all of us had a big heaping bowl.  Groovy Girl’s last words “This is actually good. I hope you make it again.”  Made my day.

This post is linked to Beth Fish Reads weekly cooking meme, Weekend Cooking.  Click her link to check out the other foodie posts and read her thoughts on Beer Wars, the film.

Next up on my to-do list.  Cleaning the guinea pig’s cage with Groovy Girl.  I know; I can feel the waves of jealousy!

Weekend Cooking; S'More Brownies

I made these brownies last weekend under the ruse that they were for Teenage Boy.  If he remains relatively respectful all week I make him a sweet treat.  It is tough to keep any teenager happy and this seems to work for him.  He loves to eat, needs to gain weight, and we get to see him smile.  It’s not like he gets to eat the whole pan by himself; I ate one or two (three or four) myself and they were out-of-this-world delicious.  I’m thinking about making them again real soon.  I miss them.

This was a spur-of-the-moment recipe and some substituting occurred.  Graham crackers aren’t a regular feature in my pantry except during the summer and early Fall s’more high season.  Club crackers on the other hand are a  staple plus I like that salty/sweet sensation.


Brownie S’Mores Bars  (makes 36 treats)
adapted from So Sweet! (Sur La Table p. 30-31)

Ingredients:
Crust
1 1/2 cups fine graham cracker crumbs (Club Crackers)
1 T. sugar
6 T. (3/4 stick) unsalted butter

Brownie Filling
6 ozs. semi-sweet chocolate
1/2 cup (1 stick) butter, cut into pieces
3/4 cup sugar
2 large farm fresh eggs, at room temperature
2 tsp pure vanilla extract
1/2 cup unbleached all-purpose flour
1/8 tsp salt
1/2 cup milk chocolate chips (I used semi-sweet)
1 1/2 cups mini marshmallows (I used regular-sized and groovy girl cut them into fourths)

1. Position an oven rack in the center of the oven, and preheat the oven to 350*F. Turn a 9-inch square baking pan upside down and mold a piece of aluminum foil to the outside.  You should have about an inch of aluminum foil overhang.  Slide the foil off the pan bottom, and turn the pan over. Slip the foil inside the pan.  Fold down any foil that extends past the top edges over the outside.  Lightly butter the foil or use spray.
2. Place the crackers crumbs, and sugar in a medium bowl.  Pour the melted butter over the cracker crumbs and stir with a silicone spatula until the mixture is evenly moistened.  Smash any lumps (groovy girl’s job)
3.Scrape the mixture into the prepared pan and use your clean fingers to press it into an even layer over the bottom of the pan.
4. Bake for 10 minutes.  Using oven mitts, transfer the pan to a cooling rack and let cool for 15 minutes.  Leave the oven on.
5. Put the chocolate on a cutting board.  Using a serrated knife, chop the chocolate into small pieces.  Put the butter in a medium saucepan, place over low heat, and heat until it melts. turn off the heat, and move the pan to a heatproof surface.  Add the chocolate to the pan, let it sit for 2 minutes, then whisk until blended.  The chocolate should be very smooth.  If it is still lumpy, let it sit for another minute or two, then whisk again.  Scrape the chocolate mixture into a large bowl.
6. Whisk the sugar into the chocolate mixture until fully blended.  Whisk in the eggs, one at a time, blending well after each egg is added.  Whisk in the vanilla.  Finally, whisk in the flour and salt.  Whisk slowly at first, then fast until batter is smooth and shiny.  It will be thick.  Stir in the chocolate chips.
7. Using a spatula, scrape the batter into the crust and smooth the top.  Bake for 25 minutes.  Using oven mitts, remove the pan from the oven, set it on a heat proof surface.  Carefully sprinkle the mini marshmallows evenly over the top.  Gently press on the marshmallows so they mush into the brownies a bit.
8. Return the pan to the oven and continue to bake for another 15 minutes, or until the brownie mixture feels firm when lightly pressed, or do the clean toothpick trick.  Transfer to the cooling rack and let cool completely.
9. To remove brownies from the pan, lift the foil out from opposite corners.  Set brownies on cutting board and peel back the foil.
10. Spray a chef’s knife and cut into 6 equal strips. Then repeat across the other way to make even bars.  Store in an airtight container or resealable zip-lock for up to 5 days.

Taste test:  We waited for them to cool (almost) and sliced them with no problems.  They were delicious and my husband (the only one in the house lacking a sweet tooth) went back for seconds.  I would make them again using Club Crackers-I thought it added a different twist and graham crackers might make it over sweet for us.  I hardly ever use milk chocolate chips preferring dark or semi-sweet.  My environmentally-friendly self would use parchment paper in the pan instead of foil next time I make them.  I think it would work just the same since I am not a fan of cooking with or in tinfoil.

I like it when I can create something this yummy with supplies I already have on hand.  Too often recipes call for two to ten odd ingredients that I have to shop for which is fine sometimes but it is always nice to whip something up without that added shopping trip.  As I grow as a “chef” I’ve learned what will make good substitutions, even in baking.

This post is linked to Beth Fish Reads Weekend Cooking meme.  Click the link to see other food-related posts.  I posted about So Sweet!
for another Weekend Cooking post about whoopie pies.

Weekend Cooking; Adzuki Beans

(Photo Credit)

     In December I reviewed Moosewood Restaurant; Cooking for Health which I’d checked out from the library.  When I had the book I wrote down a few recipes and hoped that I might get the book for Christmas.  I bought the ingredients for one of the recipes using adzuki beans because I’d never heard of them. Luckily I found them in bulk at my local organic store and it seemed like a sign.  Well, you know how things go. I had those adzuki beans in a canning jar and it was the holiday season and the days got away from me.  I never made the recipe but still had the beautiful beans staring at me every time I opened my dry storage cupboard.

     Last week I got inspired to use them but realized I hadn’t copied down the original recipe.  I did what everyone does; I googled a new recipe and this is what I found at Healthy Green Kitchen, a new foodie blog for me!  Winnie at HGK credits Ree Drummond (do I even have to say it…Pioneer Woman) for her recipe.  I made them and we’ve been eating them all week in different easy meals.

Beans
adapted from The Pioneer Woman Cooks by Ree Drummond
Serves 8-10
ingredients:                                             
*4 cups dried aduki beans (or pinto or another type of beans)
*4 slices organic uncured bacon, sliced into 1 inch pieces- optional; bacon lends a nice smoky saltiness but you can leave out for vegetarian beans
*filtered water
*1 teaspoon course sea salt or to taste
*1 teaspoon black pepper or to taste
*1 teaspoon garlic powder or to taste
*1 teaspoon chili powder or to taste
directions:
1. If not using aduki beans, it’s best to soak your beans overnight in a large pot covered with water. After they have soaked, drain them and rinse several times. If you are using the adzuki beans just go ahead and use them.
2. Place rinsed beans and bacon in a large pot on the stove. Pour water over the beans to cover by 2 inches. Bring to a boil and then reduce the heat to a simmer.
3. Skim any foam that might rise to the top while cooking, and add additional water (or stock), if there does not seem to be enough liquid.
4. Cook until the beans are tender, about 1 1/2 hours (or as long as 3 hours for pinto and other beans).
5. Add the sea salt (don’t add too much if you’ve used stock) and pepper, plus the seasonings I mentioned (or others that you like) to taste. You can serve these in whole wheat or corn tortillas with the toppings of your choice: think grated raw cheese, fresh salsa, guacamole, organic sour cream, etc. Or have some in a bowl with a side of cornbread (I made a pretty good gluten-free one that you can see in the top picture). Fresh chopped tomato, cucumber, red pepper, and sliced avocado are also wonderful additions.
6. My favorite healthy way to eat these, though, is this: chop some collard greens very fine, add some olive oil and fresh lime juice, and mix with the beans, veggies, and salsa. Top with some green onions and minced cilantro- yum yum yum!

      The first night we had them with brown rice, chopped tomatoes, a little curry sauce and whole wheat wraps.  In the middle of the week I had them on top of a green salad while my children ate pasta.  Last night I turned the last of them into my food processor with a little water, fresh squeezed lime juice and a few diced tomatoes with juice and created a refried bean consistency.  We had soft shell small tacos using the beans as our base with freshly shredded mozzarella, avocado, tomatoes, and green lettuce from our co-op.  The beans were delicious!  My kids didn’t even realize they were eating the leftover beans re-purposed!

Adzuki beans are flavorful and very useful as you don’t have to soak them at all.  If you can find them in bulk-give them a try.

This post is linked to Weekend Cooking hosted at Beth Fish Reads.  Pop over and see what other food-related bloggers are cooking up!

Weekend Cooking; The Geranium Farm Cookbook

by Barbara Cawthorne Crafton & 10,000 Geranium Farmers
(2006)               136 pages

At our church Christmas Bazaar we have a beautiful book table with used books from our members.  It is a wonderful way to share and recycle the books we have read all year.  We are a well-read and well-fed congregation as recipe books take up an entire table.

This year a had this one in my stack and my intention was to give it to my mother as she is a true cookbook collector.  I read through it one night though and fell in love with the uncomplicated recipes.  I love to read through the vignettes interspersed throughout the book as well.  I loved this quote from one

Baking Friday Afternoon

I could hardly believe my ears: Rosie requested that we bake a pie on Friday afternoon.  Always say yes when your teenager wants to do something with you-anything this side of legality.  It could be years before it happens again. (48)   ~  Barbara Cawthorne Crafton

Words of wisdom there!

I’ve made these two recipes from this book so far-both excellent.

Curried Olive Spread

1 block of cream cheese, light or otherwise
1 cup pitted, chopped green salad olives (more or less to taste and you can use exotic olives if you prefer)
1 T. curry (more or less to taste)

Cube the cream cheese, then put cheese and olives in a food processor.  Blend until mixture is slightly lumpy. Stir in curry. Can be served immediately, but sitting in the fridge for an hour or so allows the flavors to blend.  Serve with crackers, celery sticks, or toasted bread squares.

My grandmother gave me this recipe when I entered the working world. She told me there would be many occasions where I would be expected to bring an appetizer to a dinner, and this one was quick, easy, and tasted delicious.  After all, she mused, working women were busy and didn’t have all day to create fabulous food...(108)  ~ The Rev. Laurie Brock, Mobile, Alabama

Can’t resist grandmother advice either!  I served this dip with a loaf of my fresh homemade bread.  The dip made enough for leftovers and I’ve been eating that as a snack with gluten-free crackers all week.

Corn Spoon Bread

1 cup (organic) milk
1 T. (unsalted) butter
1 cup cornmeal
1 can creamed corn
2 eggs, separated
1 T. (sea) salt
1 T (freshly ground) black pepper

Scald the milk in a saucepan.  Melt the butter into the milk.  Add the cornmeal and cook until thick. Stir in the creamed corn.  Beat the egg yolks with the salt and pepper.  Stir the yolks into the corn mixture.  Beat the egg whites to stiff peaks.  Fold the egg whites into the corn mixture.  pour into a well-greased quart baking dish.  Bake at 350* for 50 minutes to 1 hour or until a wooden skewer inserted int eh middle comes out clean.  Serves 6-8
This is a favorite recipe of mine from my Indiana childhood.  ~The Rev. Gerald W. Keucher, New York, NY (123)

I have a thing about creamed corn-a childhood food memory-so this appealed to me on that level.  I made it for a church potluck and by the time I made it through the line it was gone, bowl scraped clean just as it should be at a potluck.

Link for Geranium Farm.  This post is linked to Beth Fish Reads Weekend Cooking meme.  Drop over and see what she is dishing about and many other food-related posts.

In other family news our new refrigerator has been ordered but is back-ordered.  My hope is that it arrives somewhere in the vicinity of the first two weeks of Feb.  Back order seems to happen with all appliance purchases now.
I’m reading Claire Marvel by  John Burnham Schwartz – beautifully written, taking many post-it’s to mark my favorites.
I watched Burlesque last night and loved it-don’t know why it took me a year.  Cher and Christina Aguilera were wonderful.  I watched Eat, Pray, Love also yesterday and while it dragged in spots was uplifting to me. Made me savor my own loves.  So decadent to watch two movies in one day-it was a “free” day in a way.

Weekend Cooking; I love tofu and you can too!

I love transforming this basic square of protein into delicious dishes.  I fell in love with tofu soon after leaving college and exploring my own vegetarian choices after spending my college years eating mostly from the salad bar and well, mashed potatoes!

Tofu is so easy to cook and add to recipes but I run into many people, including vegetarians, who just don’t like tofu.  I generally think it is because they haven’t experimented with it on a deeper level.  Last week I made baked tofu with coconut rice and we ate it all up.  If you’ve wanted to experiment with tofu give it a try.

This is what the tofu looks like after you cut it out of the plastic container and dice it into bite-sized squares.  With other tofu recipes you often need to drain some of the water out of the tofu by wrapping it in a dish cloth and setting a plate on top.  This recipe didn’t request that but it is good to know that you should squeeze water out first before cooking, which will help the tofu take on flavor better.
Gather the  tamari or soy sauce, organic ketchup and sesame oil together to create the sauce.  
Happily drizzle it over all that tofu.  Yum.
Stop to read the recipe again and have a sip of wine.
Start the coconut rice (recipe to follow)
Add the coconut milk after rice has had a chance to toast a bit with spices.
Sadly, once I plated this whole deal up and we sat to eat, we were all too busy eating to snap any final pictures.  There are mixed feelings about soy but my motto is “moderation is the key” and it is fun to experiment with and will pick up flavor from what you cook it with.  Groovy Girl’s favorite tofu is stir fried with just honey and tamari sauce.  I buy wheat-free, low-salt tamari from the bulk section of my organic store.
Both of these recipes are from Moosewood Restaurant; Cooking for Health.
Any Easy Baked Tofu
1 cake tofu, 16-oz firm
2 T. dark sesame oil
2 T. soy sauce 
2 T. organic ketchup
Cut the tofu into bite-sized squares and place in an un-oiled baking dish large enough to hold a single layer.  Stir together next 3 ingredients and drizzle over tofu squares.  With a rubber spatula, gently turn to coat.  In a 400* oven, bake uncovered for 30-40 minutes, stirring once or twice until tofu is browned and firm.  Serve hot or at room temperature.  Serve over rice or noodles and add a sauce ( like Trader Joe’s wonderful simmer sauces.)
Basic Brown Rice 
1 cup rinsed organic brown rice
2 tsp olive oil
scant 1/2 tsp sea salt
1 1/2 cups water
In a saucepan or skillet on high heat, stir together the rice, oil, and salt for one minute, stirring constantly.  Add the water and bring to a boil.  Reduce heat to very low, stir once and simmer covered until tender, about 45 minutes.  If you like a softer rice add 1/4 to 1/2 cup more water.
Coconut Rice
Replace 1/2 the water with unsweetened coconut milk or dried, unsweetened coconut with the raw rice.  For a golden hue, add ground tumeric (1/2 tsp)
The baked tofu did not get as crispy on the outside as I was expecting.  The kids didn’t seem to notice or care.  The rice was mellow and yummy and I liked cooking it this way instead of in a big pot of water. 
 I served the rice and tofu separately as all three of my children are not big fans of “mixed” food and this way they could add as much or as little of the tofu as they wanted.  I did add several shakes of curry powder to my husband and my plates of mixed rice and tofu to spice ours up.
This post is linked to Beth Fish Reads Weekend Cooking!
Happy Eating.

Moosewood Restaurant; Cooking for Health

I’ve spent my weekend joyfully running from store to store picking up items for my Secret Santa school family.  I had to hunt down school uniform outfits (not easy since it is not beginning of school, I guess-who would know they would NOT stock all year).  I bought the two-year old a wee baby that cries-my groovy girl said “can I just play with it for one night?”  I must have picked a good baby. It warms my heart to shop for someone in need and I love participating in this program every year.  It always makes me sad when under the mom’s wish list are things like this; any  cleaning supplies, laundry detergent, toilet tissue, dish soap.  So I got them all for her and a box of chocolates just because she deserves it.  

In between shopping and Groovy Girl’s skating lesson I’ve been nourishing my food soul with Moosewood’s latest cookbook.

Packed full of goodness this one has me scribbling down ingredients and recipes.  It also made me drop a HUGE hint to handsome husband that it was on my Christmas list.  He is pretty health conscious and is always excited about me cooking him food so it is a win-win situation for him.  With fantastic intro information the book begins with Organics, Eating Locally, Nutritional Analysis, and a wonderful chart showing pesticide levels for non-organic fruits and vegetables.  Did you know peaches rank the highest?  
As a runner my husband was most interested in “The Glycemic Index; Bad Carb, Good Carb, Fast Carb, Slow Carb section.  Recipes include a wide variety of choices from vegan to gluten-free and food allergies are  discussed as Moosewood as a restaurant now caters to many food choices beyond just vegetarianism.  I was impressed with the amount of tofu recipes and the wide variety of grains they’ve chosen.  
While I haven’t cooked anything from the book yet I will leave you with a sample list of what could become some new favorite recipes:
Scattered Sushi Salad
Ginger Tofu Soup (the veggie’s equivalent to chicken noodle soup)
Latin Corn Soup
Sweet Potato, Apple, and Chipotle Soup
Chunky Guacamole Sandwich
Curried Red Lentil Burgers
Spinach-Tofu Burgers
An Easy Baked Tofu (all my years of cooking with tofu-never have I baked it:(I’ve already bought the tofu for this one)
Quinoa and Collard Leaf Dolmas
North-South Chili
Oaxacan Green Mole Stew
Tunisian Chickpea Stew
See the list goes on and on and I haven’t even read through the dessert (Fig and Pecan Baked Apples, anyone?) section.  There is a two-page spread made for busy nights here:  “Fourteen Ways to Embellish Brown Rice.”  Each one of these beg to be tried in my kitchen.  
Don’t you want it on your Christmas list too??
This post is linked to Weekend Cooking hosted at Beth Fish Reads.  Check out all the food-related posts over there.

Weekend Cooking; Gluten-Free Girl and the Chef and other menu ideas

I browsed the new nonfiction shelves of my local library and came up with two cookbooks and two parenting books in under two minutes.  I had to quickly walk away after that because I go on these binges and bring armloads of nonfiction home only to let it sit and sit and sit until I return it two days late.

This time one recipe stuck out like a yummy thumb just waiting to be cooked.  I had a beautiful small pie pumpkin from the last farmer’s market and I didn’t know what to do with it;  no one here really likes pumpkin pie.  So I thought what the hey, I’m sure they’ll love pumpkin soup.  Ha.

I’ve enjoyed reading Gluten-Free Girl’s blog a few times on my recent quest to explore and understand celiac disease so her name popped out at me as my neck twisted sideways at the new cookbook spines. I would own this book if I were to indeed become gluten-free just for the stories splattered among the recipes. I’ve enjoyed understanding more about Shauna’s journey and their sweet love story.
How can you resist headings like; Grocery Shopping as Foreplay and Honey, remember to eat.

Many of the recipes are too complicated for me or include ingredients unavailable to me in my sleepy small town but there is much more to this cookbook than just recipes.  In a small section at the front Daniel explains the importance of “mise en place”-a perfect three paragraph summary of my cooking life.  He describes Shauna in the beginning like this “she’d put a hot pan on the burner and then start chopping her onions with the oil getting hot in the pan.  She’d run from the stove to the refrigerator while a dish was simmering, always a bit frantic.” (14)  That’s me-most of the time.  I do not set up ingredients first.  I want to be that organized and now I can name it; mise en place.  Daniel gently reminds the reader that is why the ingredients list tells us what to do; chop, dice, cups, tsps so it can be there ready!  I feel enlightened.

If you are gluten-free this book would make a great holiday gift to yourself!

I made pumpkin muffins last night while I put the finishing touches on the soup and on Wednesday afternoon I had a brownie craving and made a pan of them just like my mother used to.  I thought her recipe was magic when I was growing up.  She admitted to me just a few years ago that she peeled that recipe from the back of the Hershey chocolate can.  How deflating.  I’ve cleaned it up a bit and made it my own.

Click for recipes:

Pumpkin Soup
Chocolate Chip Pumpkin Muffins
Judy’s Chocolate Brownies
Butternut Couscous (tonight’s menu with salmon from the co-op)

p.s. my kids disliked the soup but loved the muffins even though I told them (after the fact) that the muffins also had pumpkin in them.  They didn’t care.  It’s all about the dark chocolate!  My husband, with a more discernible palate, had several bowls of soup and then,  three muffins.

I discovered a new foodie blog this week while searching for the above butternut and Israeli couscous recipe.  Meet Peter and Keith at Feast.  I scrolled through a few recipes and they all look wonderful.  I hope they keep going.

This post is linked to Weekend Cooking.  Click over to Beth Fish Reads for more food-related posts.  Happy eating!

Weekend Cooking Love

I live a rich life although I am far from wealthy and I’ve recently realized how much joy I get from participating in Weekend Cooking, the one meme I participate in all week.  Sometimes on busy weeks it is the ONLY post I make.  Like this week.  I’ve had many inspirations for posts but no spare time.

I love the community of Weekend Cooking~I love trying out their recipes, I love reading their cookbook recommendations, their inspirations and menu plans.  I’ve learned a lot about cooking and baking and I’ve had fun experimenting with recipes I might not have tried otherwise.  It’s like going to church for me.  I can find God everywhere in my life but the community of people I have a church is support network for me.  I feel that way about weekend cooking and blogging in general because it makes my life richer.  I like being part of a community of readers and eaters.

We had a church Christmas bazaar today and I made 6 loaves of bread and 12 peppermint whoopie pies.  Yum.  I’ve made the bread many times but the whoopie pies was a new attempt.  I know, risky, right to try something new for an event but seriously I can’t have 12 whoopie pies sitting around my house-I would eat them.  This way I got to share one with my family-yes, we split it three ways (Groovy Girl was at a sleep over and thus was excluded from the tasting).  I got the recipe from So Sweet! a cookbook from Sur La Table I discovered from a Bermuda Onion’s Weekend Cooking post.  Of course.  I bought the cookbook as a Christmas present for Groovy Girl.  It’s been tucked away for a few weeks and luckily she was at that sleepover so she didn’t notice me using it last night.  This compact cookbook is adorable with delectable pies, doughnuts, cookies, and cupcakes.

Here’s the recipe.

Chocolate Whoopie Pies
makes about 20 pies (It only made 12 for me; maybe I made the cookie part two big.)

Cake Ingredients
2 cups unbleached all-purpose flour
1/2 cup Dutch process cocoa
1 1/4 tsp baking soda
1 tsp salt
1 cup buttermilk
1 tsp pure vanilla extract
1/4 cup (1/2 stick) unsalted butter, at room temperature
1/4 cup vegetable shortening
1 cup brown sugar, packed
1 large egg, lightly beaten

1. Preheat oven to 425* F and position an oven rack in the center.  Lay 1 nonstick silicone baking mat or a piece of parchment each baking sheet.
2. In a medium mixing bowl, mix the flour, cocoa, baking soda, and salt together and set aside.
3. Combine the buttermilk and vanilla in a small bowl.  (Or leave it in the measuring cup like I did)
4. Cream the butter with the shortening in the bowl of a stand mixer fitted with the paddle attachment on low speed until completely mixed.  Scrape the sides of the bowl well with a rubber spatula.  Add the brown sugar and continue mixing on high speed for about 3 minutes until mixture is light brown and fluffy.  Add the egg and mix.  Scrape the sides of the bowl again.
5. Turn the mixer on low and begin adding the flour mixture and buttermilk in two alternating batches, beginning and ending with the flour mixture.
6. Scoop the batter into tablespoon-sized balls using a spring-loaded cookie scoop or a spoon and place about 2 inches apart on the prepared pan.  Bake the cakes one sheet at a time for 8 minutes, until cakes are puffed.  Transfer to a cooking rack and let cool completely.

Peppermint Filling

1/4 cup (1/2 stick) unsalted butter, at room temp.
1/3 cup vegetable shortening
1 cup marshmallow creme
1/2 cup powdered sugar
1 T. peppermint schnapps
1/2 cup crushed peppermint candies

1. Place the butter and vegetable shortening in a medium mixing bowl of a stand mixer, and beat on low speed with a paddle attachment.  Add the marshmallow cream and increase the speed to medium.  Beat for 3 minutes.
2. Add the powdered sugar and continue beating on medium speed for an additional 3 minutes.
3. Add the peppermint schnapps, beating on low speed for 1 minute.  Pipe the filling between two cakes as directed.
4. Place the crushed peppermint candies on a plate.  After assembling the pies, gently roll the edges along the crushed candies to coat.  Store as directed.

The array of whoopie pie flavors is spectacular.  Key lime, bananas foster, Kahlua and cream, black forest…Wow.  I would like to play with the filling to leave out the shortening which is a fake almost plastic flavor for me and I could taste it. I think if I added more butter and marshmallow cream it could even it out.

Thank you to Candace at Beth Fish Reads for linking together all our food-related posts.

In other cooking news I have an 11 pound locally raised turkey soaking in brine in my grandmother’s extra large crock.  We are celebrating T.giving tomorrow as a family.  I’ve also spent the week trying to go gluten-free.  It makes me stop and read the labels even more than I used to and I’m becoming educated on gluten and wheat.  I’m gaining empathy for people who really have to avoid these two ingredients.

Weekend Cooking; Happy the weekend is over (did I say that?!) with recipe

Little Women; The Musical was the play this
 weekend but keep reading for what I cooked…

It’s been a busy week with a full rehearsal schedule and opening night was Friday.  I went to all three shows as I don’t know when I’ll have the pleasure to watch Teenage Boy on stage; he is an excellent actor but dislikes being in plays.

I cooked this week.  I think the zucchini pizza from last Sunday night kick started me off creatively and the rest of the week followed through.

I made this potato soup from Lynn’s Cooking Adventures-I found it using the scientific method of googling “creamy potato soup” and then picking the 1 of 5 recipes that matched what I was dreaming of eating.  How many of you use this simple technique to find a recipe?

Someone at school left two Real Simple magazines in the lounge and I paged through one of them while waiting for my lunch to heat in the microwave.  I found this Broccoli-Quinoa Pilaf recipe-I did not make the cod but used it two days in a row for my lunch.  Heidi at 101 Cookbooks has lots of recipes listed for this power grain.  It is one of the grains I purchase from the bulk section of my local organic store, making it always available in my pantry.

I have more chickens and a turkey coming from Tim, my local farmer/meat man so I decided to make one of the last chickens from my freezer.  While I made this recipe I pondered just how I came to cook meat in my kitchen, which for years, had been vegetarian-but that’s a whole ‘nother post.  I wanted to make a BBQ chicken from homemade sauce someone gave me when I found this recipe instead as I paged through Not Your Mother’s Casseroles by Faith Durand and found Pot Chicken and Potatoes Baked in Cinnamon-Saffron Milk.   Her recipe is adapted from a Jamie Oliver recipe.

To finish the weekend off we had a potluck at church today and I wanted to bring a side dish-this one is from Durand’s casserole book.  The pan was cleaned out before I made it through the food line-I was toward the end after cleaning up the nursery-other people told me it was good though.  One grandmother even said it was her grandson’s favorite dish.  A success at the church potluck does not always happen for me!!

I had to hunt down the chef’s of two dishes that I loved (one of the great things about a potluck-trying new dishes)-one was a heavenly caramel brownie dessert served in a trifle bowl and the other was a 3-squash bake, this one was made by a friend and she shared some of the leftovers with me (hello, Monday lunch!) but the guy who made that amazing caramel dish did not share the leftover layer at the bottom.  I’m just sure he took that dish home and licked it clean!  I’ve asked for both recipes and will pass them on as I get them.

Luscious Oven Creamed Corn
(110)
casserole dish: 9 x 13-in baking dish
bake time: 45 minutes

2 T. unsalted butter
1 small onion, diced
4 1/2 cups frozen corn kernels (about 26 ozs), thawed
1 tsp salt
1 T. sugar
1/2 tsp freshly ground black pepper
1 cup milk
1/2 cup heavy cream
2 T. all-purpose (unbleached) flour
1/4 cup minced fresh chives
1/2 cup coarse yellow cornmeal
1/2 cup grated Parmesan cheese

1. Preheat the oven to 350.  (I never do this step at the beginning to save energy unless I’m baking) Lightly grease the baking dish with nonstick cooking spray or butter.
2. In a large skillet, heat the butter over medium heat.  When it foams, add the onion and cook for 5 minutes, stirring frequently.  Stir in the corn and cook just until the corn is hot.  Stir in the sugar, salt, and pepper.
3. Stir in the  milk and cream and bring to a simmer.  Whisk in the flour and cook, stirring constantly, until the mixture thickens slightly, about 5 minutes.  Remove from the heat and stir in the chives and cornmeal. Spread in the prepared baking dish and sprinkle with the Parmesan cheese.  Casserole at this point could be covered and refrigerated for up to 24 hours.
4. Bake, uncovered, for 45 minutes, or until the top is golden.  Let stand for 10 minutes before serving.

Click on all the recipe titles to find their links.  Happy cooking!
This post is linked to Weekend Cooking hosted by Candace at Beth Fish Reads.  Click her link to find many delicious food-related posts.

Weekend Cooking; Shaking things up with a new pizza recipe

(Our zucchini pizza straight out of the oven)

My husband has been very tied up this week both at work and directing a high school production of Little Women; The Musical.  He was called in to save the play when the directer originally hired for the position up and quit.  She deserted right after she’d picked the play and cast it!  Then zip, gone!  Our son is a student at the school and they’ve asked handsome husband to direct before but it’s never worked out.  This time he said yes.

What does all that have to do with my cooking week?  Our schedule has been off.  He and my son, who he sweet talked into playing an old man,  have been busy with rehearsals making this week an easy cooking week, filled with leftovers and warmed up pasta.  I did make patty melts one night with some brat burgers I found at Hansen’s, my around-the-corner dairy/local food selling utopia.   Last night we had a classic go-to comfort food dinner of refried bean burritos adding in  roasted cubed eggplant to spice it up.

Earlier in the week I’d clicked on one of Janssen’s posts at Everyday Reading to see her menu line-up and found a recipe for zucchini pizza she shared from Perry’s Plate.  I love making pizza and find it far superior to any pie purchased over the counter.  Yes, I am a pizza snob, even shredding my own mozzarella.   I have two round stones, a great pizza wheel and a recipe for dough from an old Rodale cookbook that I’ve used for years.

After reading the zucchini recipe I knew I had to try it. It is my new favorite!  My husband and I ate all of it-I saved out one square to share with my amazing library volunteer.  She and I love trading recipes and this will be good for her to try.  My kids hated it though so it is not necessarily kid-friendly.  Luckily the dough makes two pies and the second one I just tossed sauce and cheese on top and they ate it and smiled big pizza-smiles.  What they did love though was smell of the kitchen during the pie-making and baking process!  What a great tradition to pass on.

Enjoy!

Other baking news:

Perry’s Plate (at the Tasty Kitchen) has a gluten-free apple, ginger, and spice scones which uses almond flour.  I’m going to make these soon just to experiment with gluten-free.

I signed up to bake whoopie pies for our church bazaar-something Christmas-y.  Maybe a peppermint/chocolate combo.

Weekend Cooking is a weekly meme hosted by Beth Fish Reads.  Click there for many more food-related posts.